Categories
CENG469

Particle Simulation

Designing the Structure

Before everything, I started with deciding the structure I would use to code. I took the previous homework’s code as a base and deleted everything but the bare bones. Then started adding homework requirements to the code. I decided on using the following arrays:

  • gParticles: xy – coordinates, z – age
  • gVelocity: xy – current velocity, zw – initial velocity
  • gAttractors: xy – location, z – mass

I then wrote the functions regarding adding and removing attractors. I used a simple array logic where I hold the number of attractors as an integer and every attractor in the list with index bigger than number of attractor – 1 is not included in the velocity computation.

Compute Shader

After handling the initial requirements, I then moved on to the compute shader part. First of all, I changed the version to 4.3 since that was when the compute shaders were introduced.

For this part I mainly used the compute shader slides as a guide. However I did need to make some changes to make it work fully.

Initially I made the simple mistake of having two different buffers for the particles for both compute and vertex shaders. This did not work since the vertex shader is supposed to get the particles with the updated vertices. I did not pass the velocity or the attractor buffers to the vertex and fragment shaders since all I needed was the age and the positions for these shaders.

At this point I was still seeing nothing on the screen, I later found out the reason was 2 things:

  • Depth: I was choosing the depth as 1.0, which was the deepest.
  • Projection matrix: Naively, I thought I did not need it since we were working on 2D. I was suspicious as to how that would work and eventually decided on adding back the matrices but did figure out viewpoint and modeling matrices were unnecessary. The need to update the projection matrix at the reshape function gave a hint about its importance. I did a small researched and found out that I would need to make it orthographic, not projection.

After these changes, I started seeing something. This was the halfway point of my overall effort. For me, the process before seeing anything is always the hardest since there can be too many problems causing the black screen.

First Particles On Screen

By default, I chose the origin as the middle of the screen. Since the code for nearly everything was ready and needed debugging, this view is actually all the points on top of each other. Also, at this point I was initializing my projection matrix to have (0,0) right in the middle, thinking it would make it easier. I later made it from 0 to gWidth as that turned out to be easier for debugging.

I then tried to slide my origin to the side. And achieved the picture below instead. This very obviously shows a memory alignment issue.

It was a simple problem, I had started to use a 4 member struct instead of 3 and thought I had changed it everywhere, but had forgotten

After changing that, every particle was on top of each other regardless of the origin. This meant I could start playing with the velocity computations. Initially, just adding the velocity meant nothing, it would still seem as a single point. To fix that, I initialized the age of the particles with 1.0 and decremented with their index until zero. I got the result below (I was also testing the delta time variable here).

This raised a question in my mind, wouldn’t it be too line-like if I did everything the same for the points except the ages? To prevent this I initialized every point with a randomized velocity vector and passed this initial velocity to the compute shader so that when a particle reaches the end of its lifespan, it will not loose the randomness.

Adding Attractors

I then started fixing the attractors, this was the point I changed the projection matrix back to a more usual choice, where (0,0) is at the top left. I added an attractor by default at (0,0).

Please ignore the red block, the text rendering was broken

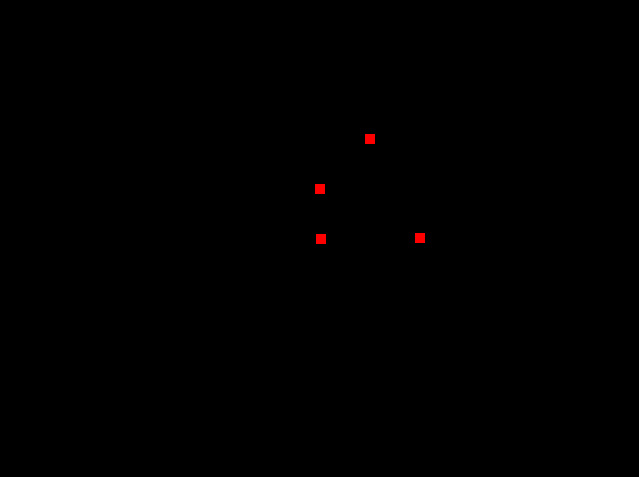
Seems like everything (except text) was working, right? That was until I decided adding new attractors. Turns out I was magically expecting the compute shader to get the updated attractors array even if I only initialized the buffer once with an allocated and then deleted array and never touched it again. Needless to say I changed that and could start to add attractors. As default, I added four attractors to the points:

Slight randomization makes the initial view less box-like

Keyboard and Mouse

A slight tangent to mention the key bindings:

  • Q: Closes the window
  • W: Increases delta time
  • S: Decreases delta time
  • T: Toggles text
  • R: Stops/starts particle movement
  • G: Changes mouse mode
  • V: toggles vsync
  • F: Makes the window fullscreen (This was working a bit weird at the ineks, it would turn the whole monitor into a blackscreen for a while.)
  • Mouse left button: adds a new attractor with the mass value on the screen to the clicked position or changes the origin to the clicked position.
  • Mouse right button: Removes an attractor.
  • Mouse scroll: Increases or decreases the to-be-added attractor’s mass

Particle Motion

This was the fun part. Before this, I added one+one blending to make the final result appealing. Initially dividing the velocity with dot(dist,dist) would result in a weird movement so for a while I had removed it. For a while I also had no limits for the delta time so the interesting visuals below were formed:

I then decided to use sqrt(dot(dist,dist)) and everything looked way more smooth, it was like a magical touch.

Particle Count vs FPS

I have an intel GPU.

Particle CountFPS (w/o vysnc)
10^34900
10^44400
10^51900
10^6220
10^722

Final Result

One thing I did not do was to make the resizing keep the proportions of the window, i.e. if the origin is at the middle it should still be in the middle of the window after the resize. This is not the case currently, the placements of the points do not change, they just wander to a bigger area. Video (sorry for the lack of video quality):

Categories
CENG469

Deferred Lighting

Hello! This is the blog for my deferred lighting homework. The homework mainly includes: cubemaps, hdr and tone mapping, deferred lighting, motion blur. This blog will not be in order of how I did things as I preferred to explain things in a cleaner order.

Cubemap and HDR

I started with the cubemap by writing a cubemap.obj file. I changed the 2d texture arrangements to 3d cubemap. This part was mostly seamless.

Initially, I did sigmoidal compression only to be able to see better. In this part, I also added the exposure and gamma correction variables.

Mouse Movement

I then moved on with the mouse movement. At first I tried to do it with two quaternions one for the right vector and one for the up vector. However, this did not feel like a first person camera at all, so I then replaced up vector with y-axis. This felt way more smooth. Though it did introduce a problem, if the user looks towards exactly 90 degrees up, the gaze vector shifts abruptly. This could be solved by limiting the gaze slightly but I did not have time left for that so that abrupt change is still present.

Adding Armadillo

Adding armadillo without the deferred lighting was the easiest. In this part I arranged its location and the light location itself to make sure it was in a proper place where I could see. I did not choose to have one light, I actually thought about doing more after I was done with everything, but I was never done with everything.

Initial armadillo w/o deferred rendering
I tried to match my light with the sun in the cubemap

Texts and FPS

I then moved on to the text. I had some trouble making them visible on the screen because I forgot to bind its texture and had some blending issues. The below picture shows when I was unable to show the text properly, I then fixed it by enabling blending before writing my texts onto the screen.

For the fps, I initially recalculated it for every frame I would render. But that would make it flicker between 59 and 60 a lot so I then limited it to change each second.

Deferred Lighting

I died a little bit here. Though I followed both the video and the documentation for deferred shading, for a long while I could not render anthing properly. My quad just would not show anything and I could only see something when I rendered the quad as armadillo which is below.

I was so confused because I was doing everything in the tutorials and this took me around two days to figure out. I even rewrote the code for deferred rendering from scratch (which made my code in the end way clearer so I’m glad).

It was such a minor mistake, I was rendering my quad wrong. Originally, I was trying to render it like a face of the cubemap. But then I checked how the renderQuad function in opengl tutorials were coded and implemented that. Worked like a charm, I was on the verge of tears. Everything else was already ready so I could directly get the position and normals look.

Keyboard and Window

I then implemented some more minor things such as the key bindings and the window resizing. To fix the placements of the text, I called the function that calculates the perspective in the reshape function. I did not fix the aspect ratio to 1 so that the visuals would not stretch as shown in the picture below.

For the keyboard the buttons are as follows:

  • Q: close window
  • R: Toggle rotation
  • G: toggle gamma correction
  • V: toggle vsync
  • space: toggle fullscreen
  • +/up: increase exposure (I did not have a numpad)
  • -/down: decrease exposure
  • 0: TONEMAPPED
  • 1: CUBE_ONLY
  • 2: MODEL_WORLD_POS
  • 3: MODEL_WORLD_NOR
  • 4: DEFERRED_LIGHTING
  • 5: COMPOSITE
  • 6: COMPOSITE_AND_MB

Composite and Motion Blur

For motion blur, I took the function in the slides and arranged it so that it would blend the whole screen regardless of depth. I initially thought I would make it more optimized, but ran out of time and could not. Doing the motion blur itself was not challenging, but handling the composite structure that would do the blurring was. At first I tried to do it without an extra buffer, then gave up and added the buffer. For a while I swam in blits, clears, depths, enables and disables and buffers. I really should learn to first learn then implement because that would be way easier, but then again I cannot learn anything without implementing.

The final structure that worked for me:

  • Geometry pass on gbuffer
  • Arranging blending ( by making armadillo’s alphas 1.0)
  • Lighting pass on gBlurbuffer (used for both blurring and tone mapping)
  • Rendering cubemap on gBlurbuffer
  • Tone mapping and motion blur on default buffer

I then wrote the blur function to the final shader and only enabled it if blursize is bigger then 0. I found blursize by simply finding the manhattan distance between the past cursor point and the present and limited it to be maximum 20 (otherwise my poor laptop would freeze). The motion blur is not the best, though it would be very easy to make it more efficient with the code at hand, I just need to change how blurSize changes.

Tone Mapping

After handling motion blur, the base for the tone mapping was already ready. I initially tried to calculate the average log luminance manually by bringing the texture to cpu and multiplying. This reduced the fps greatly, so then I did what the pdf recommended. I created a mipmap for the texture I used with gBlurbuffer and calculated the average log luminance with the 1×1 mipmap. I love giving myself heart attacks so I forgot to give the key value as a uniform but instead wrote it as “in” and could not see anything at first.

Final

I fixed the floats and booleans in text because they were bothering me, added the pressed keys to the screen.

I learned a lot of things, even when I thought I had understood everything. It took longer than I expected but ended nicely.

I still did not download any application for screen recording , so here are some screenshots.

What is missing?

  • The abrupt change of gaze when we look up 90 degrees up.
  • Resize is not smooth (on my computer), though when I tried it on inek it was smooth but I did nothing to make it so.
  • Motionblur is not based on time but based on how many frames it will take for it to diminish. Not the best look in my opinion.
  • The armadillo started to get cropped after I implemented diffused rendering.
  • This is the most trivial one but texts are not aligned dynamically, so the writing for tonemapped just seems floating in air.
  • I was a bit confused about in which mode I was expected to do gamma correction, so now I just apply it in the TONEMAPPED mode.